RSyslog Windows Agent 8.1 Released
Release Date: 2025-07-16
Build-IDs: Service 8.1.0.232, Client 8.1.0.321
Enhancements |
|
Bugfixes |
|
You can download Free Trial Version of RSyslog Windows Agent.
RSyslog Windows Agent 7.1 Released
Release Date: 2021-07-14
Build-IDs: Service 7.1.0.214, Client 7.1.0.300
Features |
|
Bugfixes |
|
You can download Free Trial Version of RSyslog Windows Agent.
RSyslog Windows Agent 7.0 Released
Release Date: 2021-03-09
Build-IDs: Service 7.0.0.213, Client 7.0.0.297
Features |
|
Bugfixes |
|
You can download Free Trial Version of RSyslog Windows Agent.
RSyslog Windows Agent 3.3 Released
Adiscon is proud to announce the 3.3 release of RSyslog Windows Agent.
This is a bugfixing release with minor feature update.
Most importantly, the Adiscon SNMP MIB now supports messages sizes up to 64k (previous limit was 255 characters). The OpenSSL Library has been updated to 1.0.2h. Bugs were fixed primarily in RELP and syslog forwarding processing. For details please see the change log.
Detailed information can be found in the version history below.
Build-IDs: Service 3.3.152, Client 3.3.235
Features |
|
Bugfixes |
|
Version 3.3 is a free download. Customers with existing 2.x keys can contact our Sales department for upgrade prices. If you have a valid Upgrade Insurance ID, you can request a free new key by sending your Upgrade Insurance ID to sales@adiscon.com. Please note that the download enables the free 30-day trial version if used without a key – so you can right now go ahead and evaluate it.
RSyslog Windows Agent 3.2 Released
Adiscon is proud to announce the 3.2 release of RSyslog Windows Agent.
This is a maintenenance release for RSyslog Windows Agent, which includes Features and bugfixes.
There is a huge list of changes, but the most important is the enhanced support for file based configurations.
Also inbuild components like OpenSSL and NetSNMP have been updated to the latest versions.
Detailed information can be found in the version history below.
Build-IDs: Service 3.2.143, Client 3.2.0.230
Features |
|
Bugfixes |
|
Version 3.2 is a free download. Customers with existing 2.x keys can contact our Sales department for upgrade prices. If you have a valid Upgrade Insurance ID, you can request a free new key by sending your Upgrade Insurance ID to sales@adiscon.com. Please note that the download enables the free 30-day trial version if used without a key – so you can right now go ahead and evaluate it.
RSyslog Windows Agent 2.2 Released
Adiscon is proud to announce the 2.2 release of RSyslog Windows Agent.
This is the maintenance release and contains mainly bugfixes.
Most notably, this version includes OpenSSL library 1.0.1g. This fixes the latest openssl security issues known as heartbleed.
Remote Eventlog Monitoring in Eventlog Monitor V2 has been improved.
Detailed information can be found in the version history below.
Build-IDs: Service 2.2.117, Client 2.2.0.141
Features |
|
Bugfixes |
|
Version 2.2 is a free download. Customers with existing 1.x keys can contact our Sales department for upgrade prices. If you have a valid Upgrade Insurance ID, you can request a free new key by sending your Upgrade Insurance ID to sales@adiscon.com. Please note that the download enables the free 30-day trial version if used without a key – so you can right now go ahead and evaluate it.
RSyslog Windows Agent 2.1 Released
Adiscon is proud to announce the 2.1 release of RSyslog Windows Agent.
This new minor release contains some new features Continue reading “RSyslog Windows Agent 2.1 Released”
RSyslog Windows Agent and CEE
The Rsyslog Windows Agent comes with support for the new CEE enhanced format out of the box. It is designed to work flawlessly with all components from the Adiscon product lines and other CEE enhanced-enabled products. And it is one of the first products to support the Project Lumberjack at all. If you do not know what CEE enhanced is good for, it might be wise to watch our introduction into CEE.
In this guide, we will show the necessary steps to create a configuration for the RSyslog Windows Agent to output CEE enhanced conform log messages. The setup itself is very simple and does not differ a lot from other basic setups. In the end we will have a configuration, that will poll Windows EventLogs and forward them via syslog in CEE enhanced format to another syslog server.
Step 1: Setting up the ruleset and action.
1. First we define a new rule set. Right-click “Rulesets”. A pop up menu will appear. Select “Add Rule Set” from this menu.
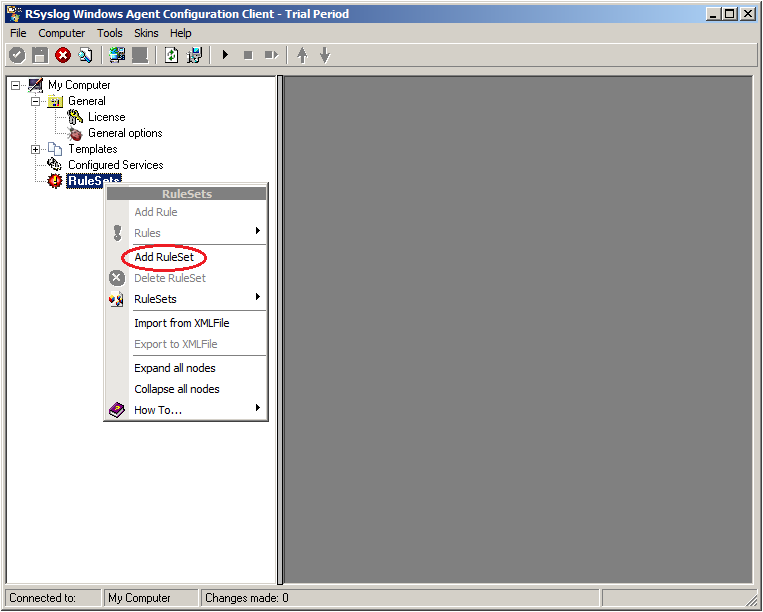
2. Then, a wizard starts. Change the name of the ruleset to whatever name you like. We will use “Forward syslog” in this example. The screen looks as follow:
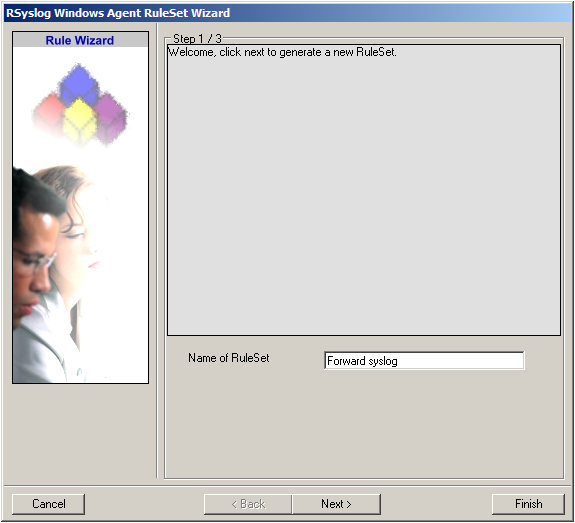
Click “Next” to go on with the next step.
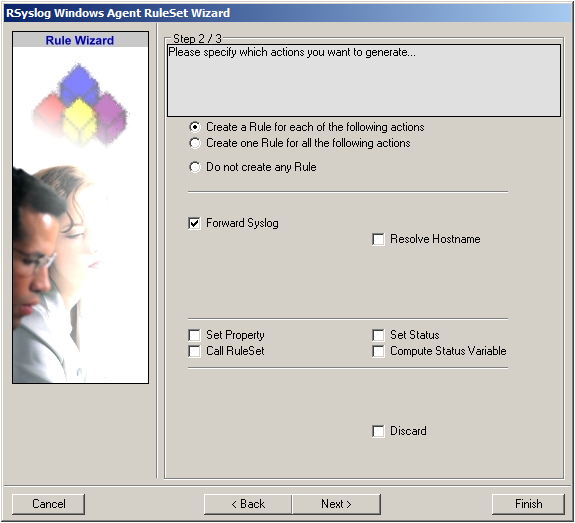
3. Select only Forward via Syslog. Do not select any other options for this sample. Also, leave the “Create a Rule for each of the following actions” setting selected. Click “Next”. You will see a confirmation page. Click “Finish” to create the rule set.
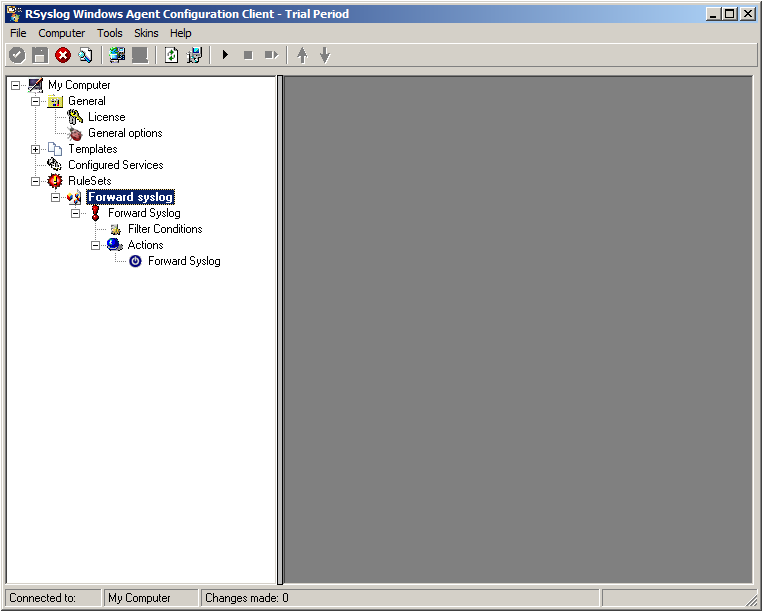
4. As you can see, the new Rule Set “Forward syslog” is present. Please expand it in the tree view until the action level of the “Forward syslog” Rule and select the “Forward syslog” action to configure.
5. Configure the “Forward via Syslog” Action
Insert the IP of your syslog server into the field “Syslog Server”. You can change the port if needed as well. We will keep it on the default port 514. You could also change to protocol type to TCP for example. Attention RSyslog Windows Agent and your syslog server must use the same port and the same protocol.
But you need to change the “Used Message Format”. Click on the dropdown menu to see the options and choose “Use CEE enhanced Syslog Format”.
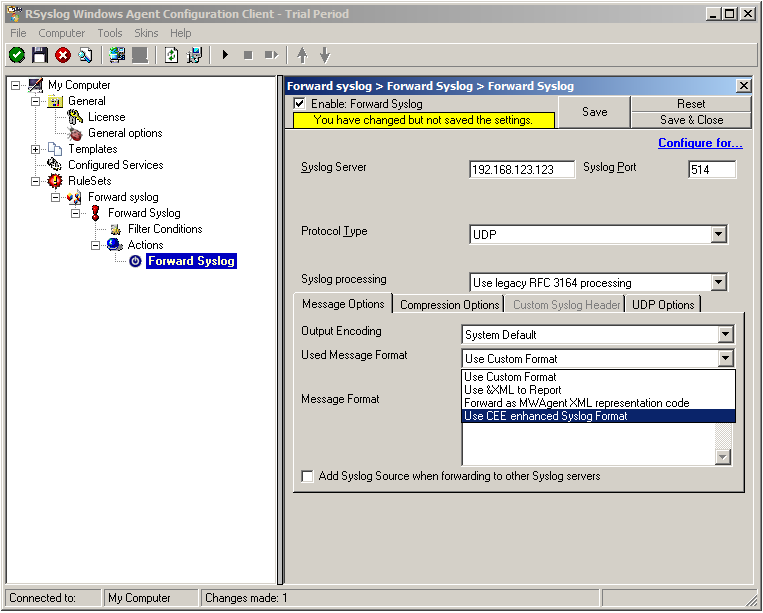
The configuration for syslog forwarding should now look like this:
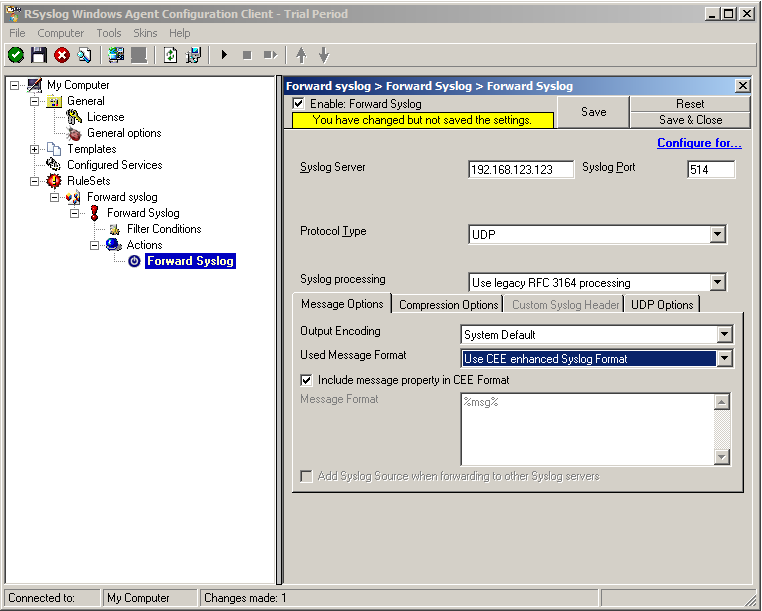
6. Finally, make sure you press the “Save” button – otherwise your changes will not be applied.
Step 2: Setting up the EventLog Monitor V2.
Note: This guide explains how to set up the EventLog Monitor V2 Service for Windows Vista/z/2008. These steps are not applicable if you are using Windows XP/2000/2003. In that case, please use the regular EventLog Monitor.
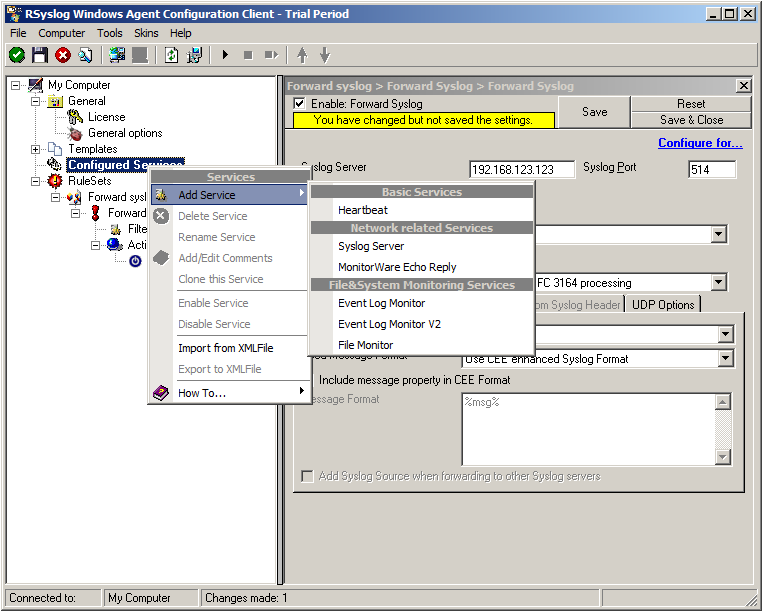
1. First, right click on “Services”, then select “Add Service” and then “Event Log Monitor V2”:
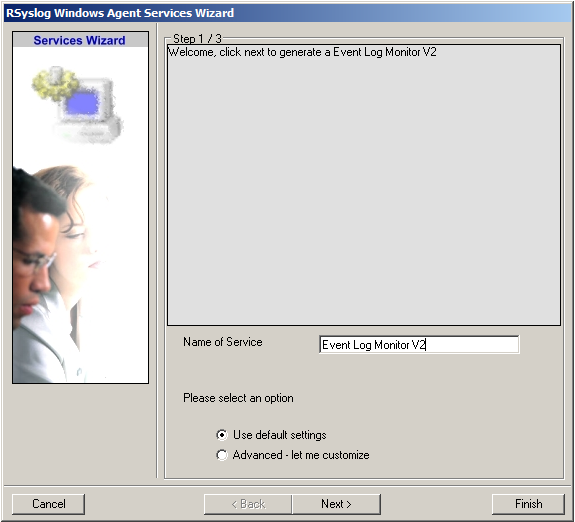
Again, you can use either the default name or any one you like. We will use the default name in this example. Leave the “Use default settings” selected and press “Finish”, as we are not changing any other settings right now.
2. Now, you will see the newly created service beneath the “Services” as part of the tree view. To check its parameters, select it:
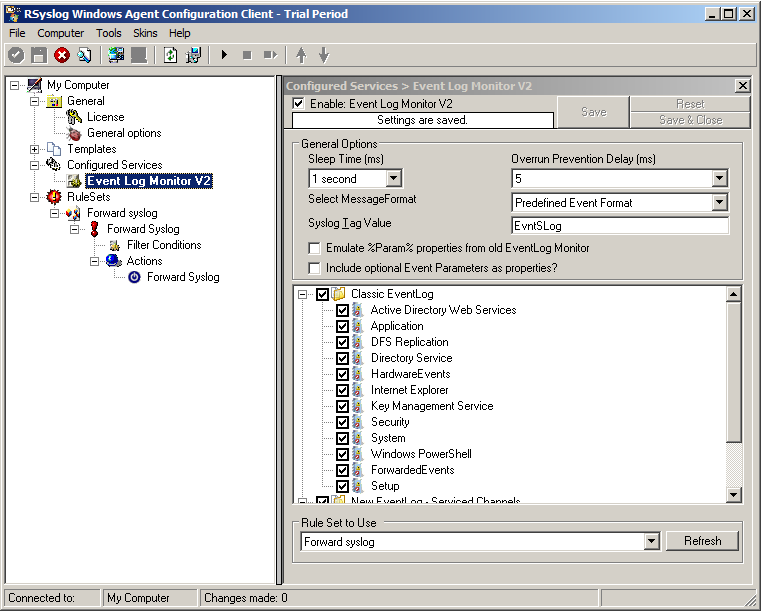
As you can see, the service automatically checks for all present EventLogs. You can now select or disable certain logs or change some of their properties.
Note: The ruleset “Forward Syslog” has been automatically assigned as the ruleset to use. By default, the wizard will always assign the first rule set visible in the tree view to new services.
Step 3: Starting the Service.
5. The last step is to save the changes and start the service. This procedure completes the configuration of the syslog server.

The Service cannot dynamically read changed configurations. As such, it needs to be restarted after such changes. In our sample, the service was not yet started, so we simply need to start it. If it already runs, you need to restart it.
We are now finished. You should now receive the Eventlog messages on your syslog server in CEE enhanced format.
How To setup EventLogMonitor V2 Service
Note: This guide explains how to set up the EventLog Monitor Service for Windows Vista. These steps are not applicable if you are using Windows XP.
1. First, right click on “Services”, then select “Add Service” and then “Event Log Monitor V2”:
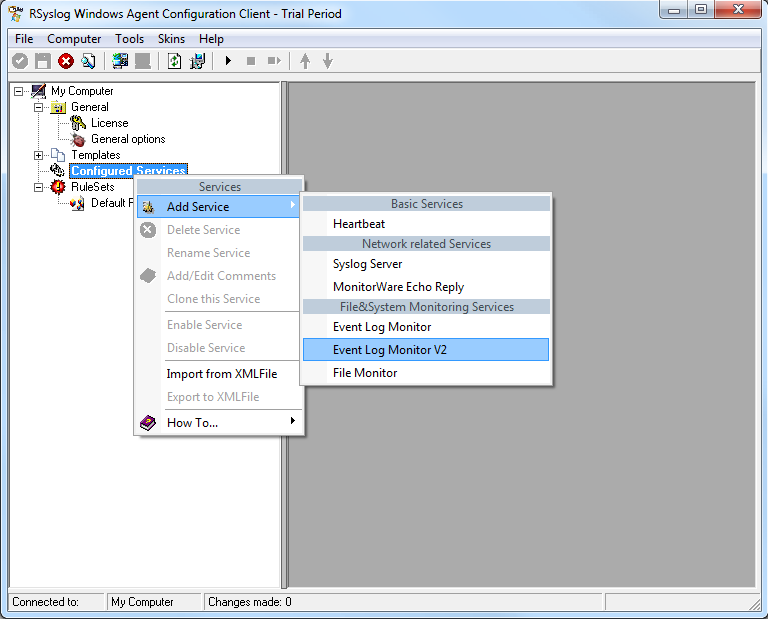
Again, you can use either the default name or any one you like. We will use the default name in this sample. Leave the “Use default settings” selected and press “Next”.
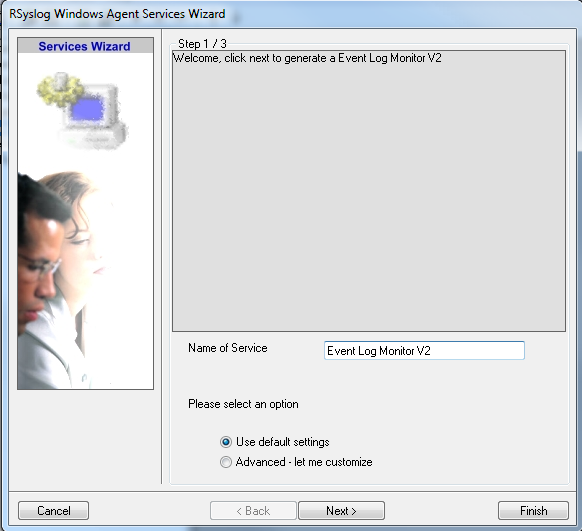
2. As we have used the default, the wizard will immediately proceed with step 3, the confirmation page. Press “Finish” to create the service. The wizard completes and returns to the configuration client.
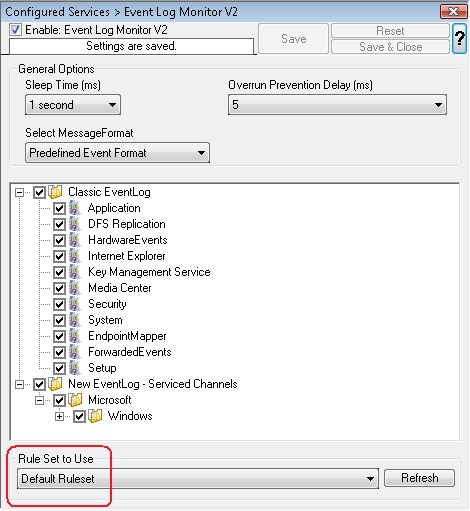
3. Now, you will see the newly created service beneath the “Services” as part of the tree view. To check its parameters, select it:
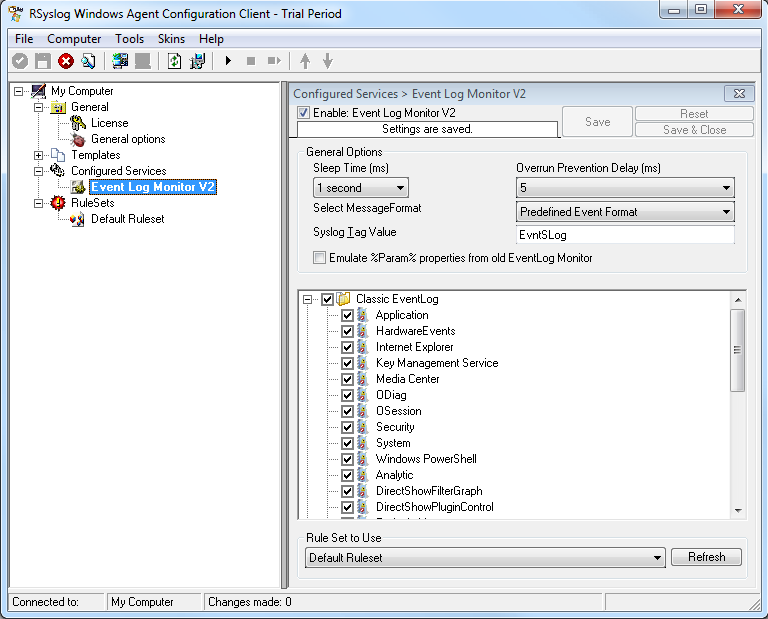
As you can see, the service has been created with the default parameters.
Note: The “Default RuleSet” has been automatically assigned as the rule set to use. By default, the wizard will always assign the first rule set visible in the tree view to new services.
4. Finally we, bind a ruleset to this service. If you already have a ruleset, simply choose one. If not, then you will have to create one, or insert the actions you want to take in the default ruleset.
Remember, this is only an example. You can do it in any way you want.
5. The last step is to save the changes and start the service. This procedure completes the configuration of the syslog server.

The NT Service cannot dynamically read changed configurations. As such, it needs to be restarted after such changes. In our sample, the service was not yet started, so we simply need to start it. If it already runs, you need to restart it.
That’s it. This is how you create a simple Event Log Monitor V2 for Vista.
