Using TLS for receiving log messages
In this guide, we want to describe, how to use the RSyslog Windows Agent with TLS encrypted syslog. This specific part will describe the setup steps for receiving syslog from a Linux rsyslog installation. First, as a preliminary, you should read the guide from the rsyslog documentation for “Encrypting Syslog Traffic with TLS (SSL)”. It describes in details the overall setup, how certificates are generated and how the clients and server need to be set. It is strongly suggested to be read as a whole.
Since we will receive syslog messages via TLS and we can only forward messages via syslog (with TLS or without) the whole setup will basically resemble what we described in our guide for a syslog relay. Therefore, we will only show how to setup the syslog service.
Step 1: Machine certificates
The easiest way to create the machine certificates is as described in the Linux guide above. So please create a machine certificate as described here: Generating Machine Certificates
Please provide your Windows machine with those certificates. Make sure, that they are safe and cannot get into someones’ hands.
Step 2: Setting up the ruleset and action.
Usually we start by creating the ruleset, rule and action. The reason lies in the configuration structure. So we will first create the mentioned items. In the end, we will have a basic rule with no particular filter and a forward via syslog action. That means, that all messages will be forwarded to a central host.
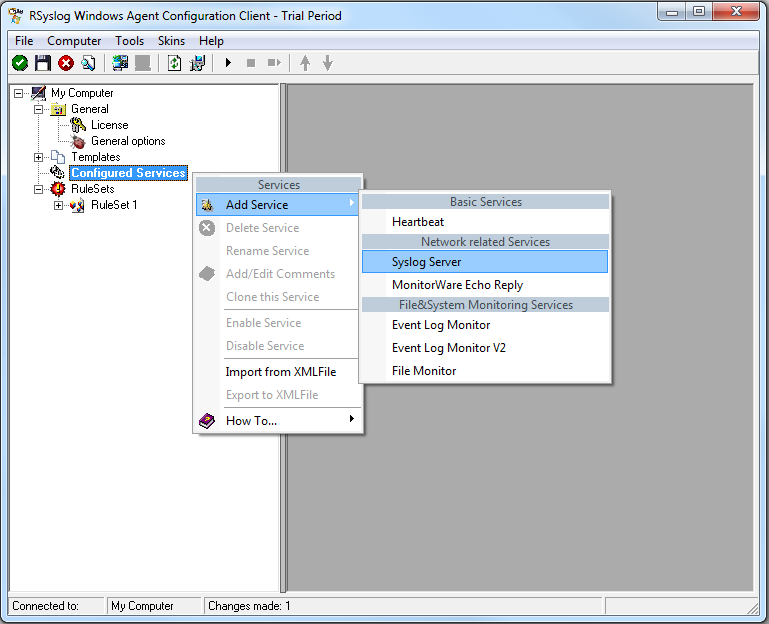
Step 3: Create a Syslog Server Service
Now we need to create a syslog server service.
To create it, right click on “Services”, then select “Add Service” and the “Syslog Server”:
Once you have done so, a new wizard starts:
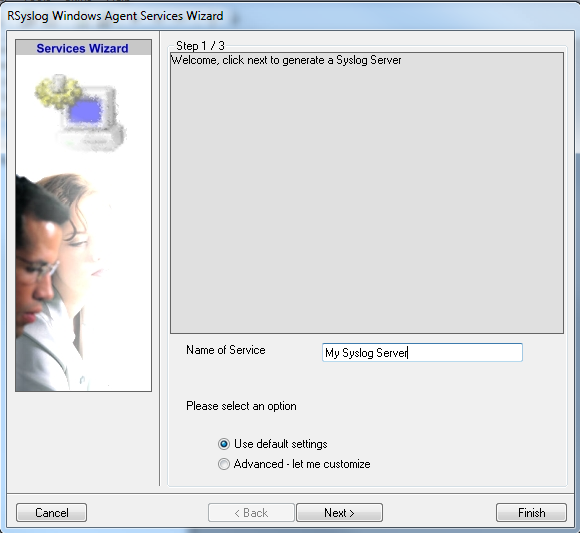
Again, you can use either the default name or any one you like. We will use “My Syslog Server” in this example. Leave the “Use default settings” selected and press “Next”:
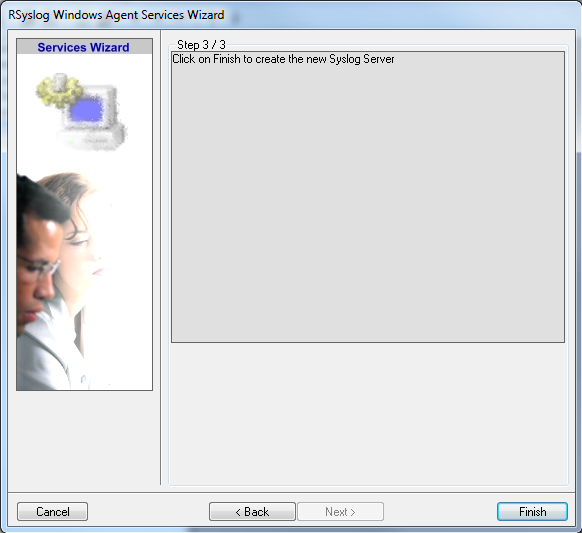
As we have used the default, the wizard will immediately proceed with step 3, the confirmation page. Press “Finish” to create the service. The wizard completes and returns to the configuration client. There, you will see the newly created service beneath the “Services” part of the tree view:
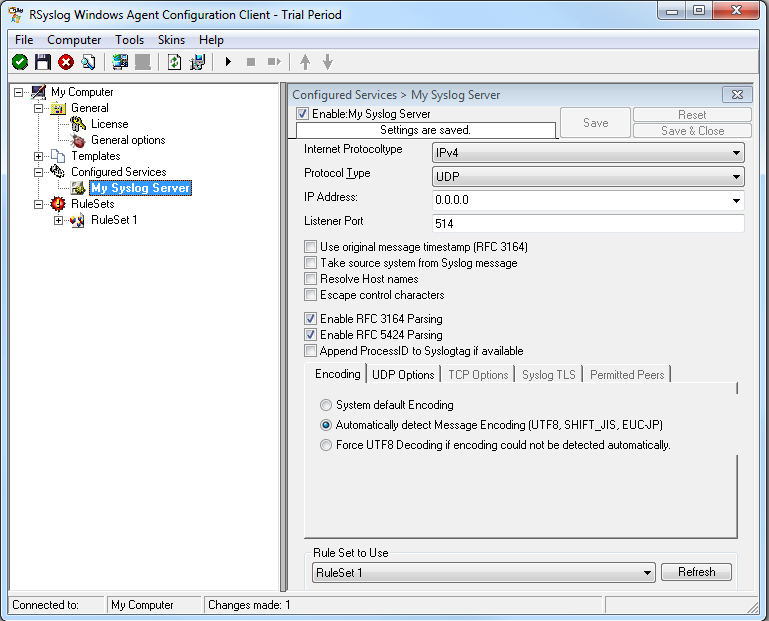
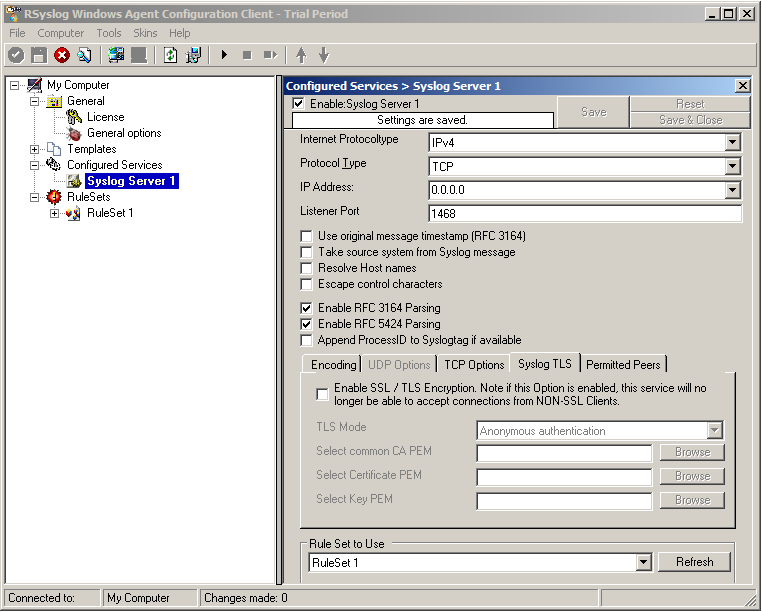
As you can see, the service has been created with the default parameters. As such, it operates as a RFC compliant standard Syslog server. But, we still need to make some changes so we can receive TLS syslog.
Step 4: Changing to TLS
First we need to change the protocol type. Change it to TCP. TLS syslog is not available with UDP. If you want, you can change the port to what your clients use for sending.
Now in the lower part of the configuration window click on the tab Syslog TLS. This is where the important TLS settings will be made.
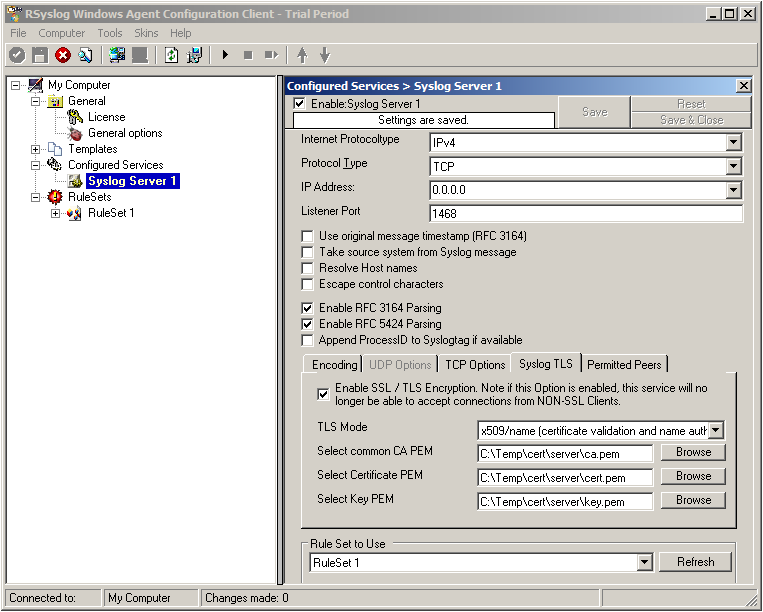
Now check the box for “Enable SSL / TLS Encryption”. The other options become available now. We suggest using x509/name mode, which is obviously the most secure of the available modes.
Below, select your PEMs that you created in Step 1 and submitted to the machine. It should look something like this, though your paths and certificate names might be different.
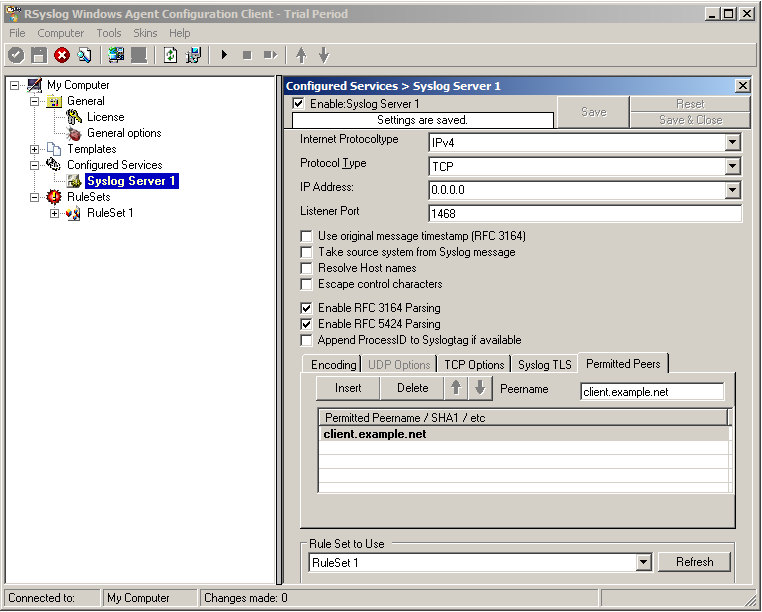
Now we can go on to the Permitted Peers tab. Here we define the systems that are allowed to send their syslog messages to our relay host. You could also use wildcards for the peers, like *.example.net. Just look below:
That is basically what we need to set up when receiving syslog via TLS.
Final Thoughts
That is just the setup need for receiving syslog via TLS in RSyslog Windows Agent. This is, as we already mentioned before, for a setup where the RSyslog Windows Agent is used as a relay. You could also apply TLS syslog to the outgoing syslog traffic, but that is not what we wanted to show here.